第七章
题库微信小程序端功能开发
优就业.JAVA教研室
学习目标
- 了解 微信小程序项目创建及初始化配置
- 掌握用户登录注册功能开发
- 掌握题库分类功能开发
- 掌握题库列表功能开发
- 掌握题目详情功能开发
- 掌握内网穿透
一、项目创建及初始化配置
1.1、创建项目
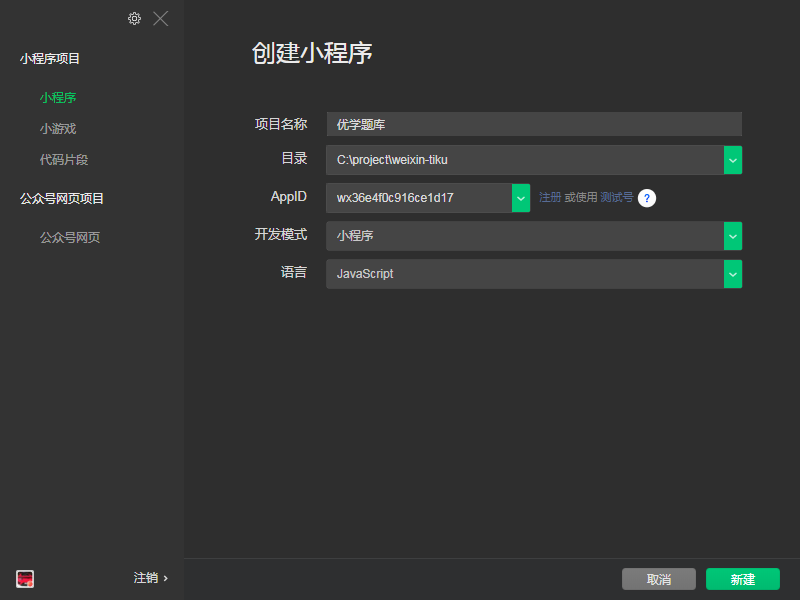
新建项目优学题库,开发模式选择 小程序, 语言 选中 JAVAscript
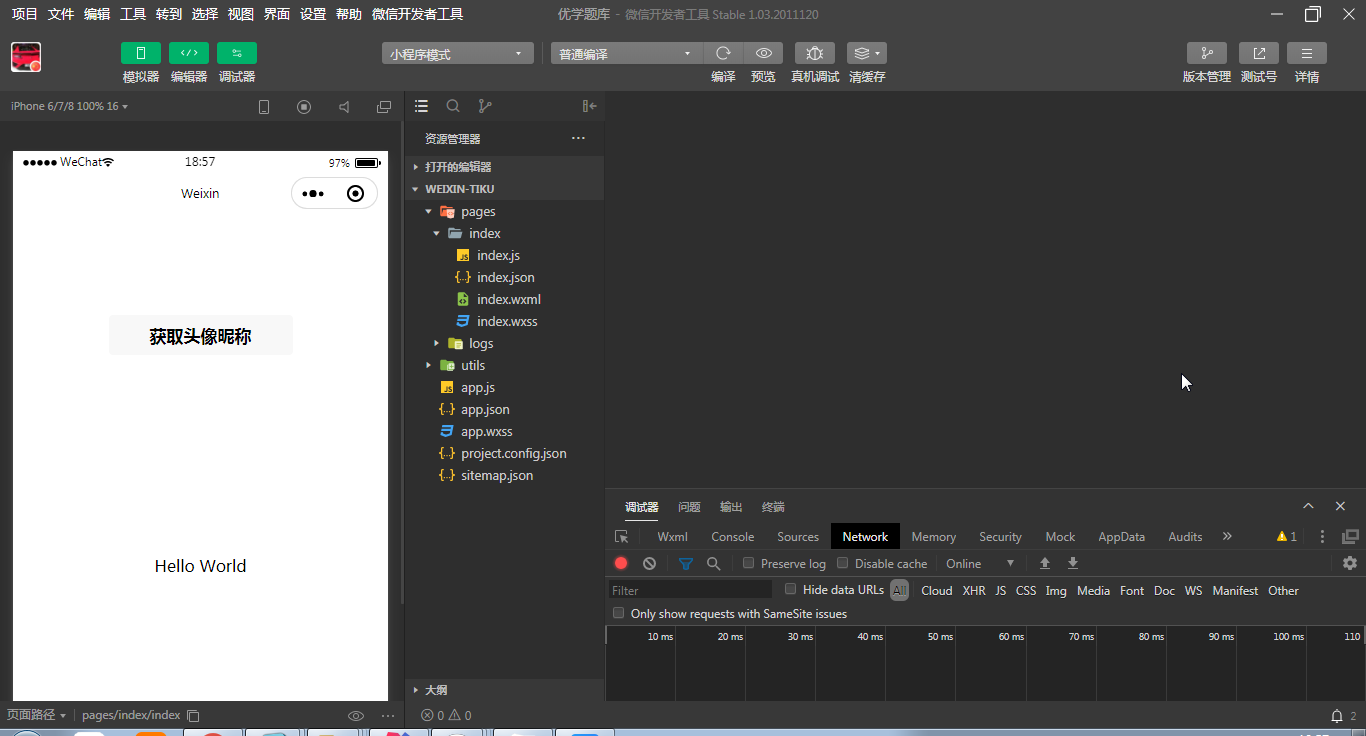
创建好的项目结构及目录
1.2、拷贝相关样式、配图等静态资源
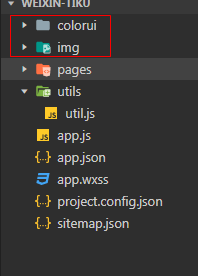
把样式、配图等静态资源拷贝到项目的根目录

拷贝后目录
1.3、配置基础样式
修改app.wxss
/**app.wxss**/
/**app.wxss**/
@import "colorui/main.wxss";
@import "colorui/icon.wxss";

.container {
  height: 100%;
  display: flex;
  flex-direction: column;
  align-items: center;
  justify-content: space-between;
  padding: 200rpx 0;
  box-sizing: border-box;
}

.text-row {
    display: flex;
    flex-direction: row;
    align-items: center;
  }
  .text-column {
    display: flex;
    flex-direction: column;
    align-items: center;
  }
  .scrollPage {
    height: 100vh;
    -webkit-overflow-scrolling: touch;
  }
  .page_bottom {
    position:fixed;
    width: 100%;
    height: 50px;
    bottom: 0px;
    display: flex;
    color: black;
    text-align: center;
    font-size: 20px;
  }

.page_bottom_left {
    position: fixed;
    left: 0px;
    bottom: 0px;
    width: 58px;
    height: 48px;
    line-height: 49px;
    border: 1px solid;
    border-color: #000;
    border-right-color: #888;
  }

  .page_bottom_msg {
    position: fixed;
    left: 70px;
    bottom: 0px;
    width: 120px;
    height: 25px;
    line-height: 24px;
    font-size: 19px;
    text-align:left;
  }

  .page_bottom_star {
    position: fixed;
    right: 125px;
    bottom: 0px;
    width: 25px;
    height: 25px;
    font-size: 19px;
    line-height: 24px;
  }

  .page_bottom_last {
    position: fixed;
    right: 60px;
    bottom: 0px;
    width: 58px;
    height: 48px;
    line-height: 49px;
    border: 1px solid;
    border-color: #000;
    border-left-color: #888;
  }

  .page_bottom_next {
    position: fixed;
    right: 0px;
    bottom: 0px;
    width: 58px;
    height: 48px;
    line-height: 49px;
    border: 1px solid;
    border-color: #000;
    border-left-color: #888;
  }
1.4、配置和后端服务接口调用地址
修改配置文件app.js
  globalData: {
    userInfo: null,
    baseUrl: "http://localhost:8888/wx"

  }
baseUrl地址即为和后端服务器接口调用地址
1.5、创建对应的页面
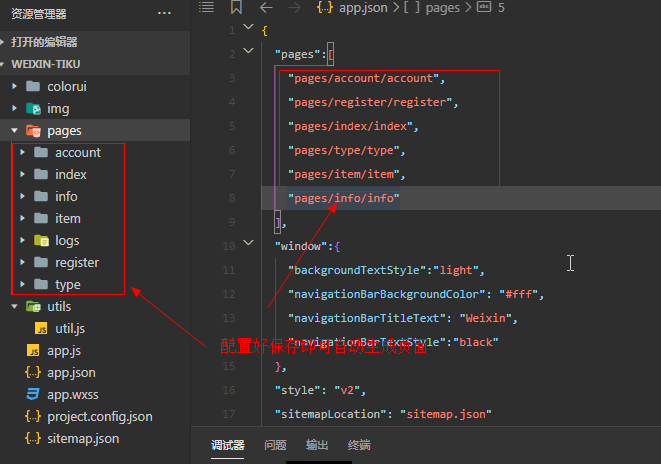
修改配置文件app.json,修改对应的pages数组,修改内容如下:
 "pages/account/account",
    "pages/register/register",
    "pages/index/index",
    "pages/type/type",
    "pages/item/item",
    "pages/info/info"
注意默认主页为登录页面!
页面设计规划功能如下:
| 页面名称 | 页面路径 | 说明 |
|---|---|---|
| 登录页面 | pages/account/account | 账号登录,在tabBar有定义(默认主页) |
| 注册页面 | pages/register/register | 账号注册 |
| 用户信息 | pages/index/index | 获取用户微信账号 ,tabBar有定义 |
| 题库分类 | pages/type/type | 获取题库分类 |
| 具体分类实体列表页 | pages/item/item | 显示选定分类的试题列表 |
| 题目详情页面 | pages/info/info | 显示题目详情信息 |
配置好,保存,即可自动生成对应的页面!
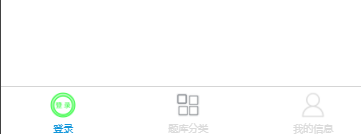
1.6、配置tabBar
修改配置文件app.json
  "tabBar":{
    "color": "#dbdbdb",
    "selectedColor": "#1296db",
    "backgroundColor": "#ffffff",
    "borderStyle": "black",
    "list": [{
       "pagePath":"pages/account/account",
       "iconPath": "img/login.png",
        "selectedIconPath": "img/login-select.png",
       "text":"登录"
    },{
      "pagePath":"pages/type/type",
      "iconPath": "img/icon_component.png",
        "selectedIconPath": "img/icon_component_HL.png",
      "text":"题库分类"

    },{
      "pagePath":"pages/index/index",
      "iconPath": "img/user.png",
        "selectedIconPath": "img/user-select.png",
      "text":"我的信息"

    }]

    },
tabBar效果:
二、用户登录注册功能开发
2.1、创建用户登录页面
2.1.1、修改页面文件:pages\account\account.wxml
<view class="container">

 <view class="login-icon">
 <image class="login-img" src="../../img/loginLogo.png"></image>
 </view>
 <view class="login-from">

 <!--账号-->
 <view class="inputView">
  <image class="nameImage" src="../../img/name.png"></image>
  <label class="loginLab">账号</label>
  <input class="inputText" placeholder="请输入账号" bindinput="usernameInput" />
 </view>
 <view class="line"></view>

 <!--密码-->
 <view class="inputView">
  <image class="keyImage" src="../../img/key.png"></image>
  <label class="loginLab">密码</label>
  <input class="inputText" password="true" placeholder="请输入密码" bindinput="passwordInput" />
 </view>

 <!--按钮-->
 <view class="loginBtnView">
  <button class="loginBtn" type="primary"  bindtap="login">登录</button>
 </view>
   <view>
    <button class="loginBtn" type="primary" >开始注册</button>
   </view>
 </view>
</view>
2.1.2、修改页面样式文件:pages\account\account.wxss
page{
  height: 100%;
 }

 .container {
  height: 100%;
  display: flex;
  flex-direction: column;
  padding: 0;
  box-sizing: border-box;
  /* background-color: rgb(156, 23, 78) */
 }

 /*登录图片*/
 .login-icon{
  flex: none;
 }

 .login-img{
  width: 750rpx;
 }

 /*表单内容*/
 .login-from {
  margin-top: 20px;
  flex: auto;
  height:100%;
 }

 .inputView {
  /* background-color: #fff;  */
  line-height: 45px;
  border-radius:20px;
   border:1px solid #999999;
 }

 /*输入框*/
 .nameImage, .keyImage {
  margin-left: 22px;
  width: 18px;
  height: 16px
 }

 .loginLab {
  margin: 15px 15px 15px 10px;
  color: #545454;
  font-size: 14px
 }

 .inputText {
  flex: block;
  float: right;
  text-align: right;
  margin-right: 22px;
  margin-top: 11px;
  color: #cccccc;
  font-size: 14px
 }
 .line {
  margin-top: 8px;
 }

 /* .line {
  width: 100%;
  height: 1px;
  background-color: #cccccc;
  margin-top: 1px;
 }  */

 /*按钮*/
 .loginBtnView {
  width: 100%;
  height: auto;
  /* background-color:#DCDCDC;  */
  margin-top: 0px;
  margin-bottom: 0px;
  padding-bottom: 0px;
 }

 .loginBtn {
  width: 90%;
  margin-top: 40px;
  border-radius:10px;
 }
 .operate{
  display: flex;
  flex-direction: row;
 }
.operate view{
    margin: 0 auto;
    margin-top: 40px;
    font-size: 14px;
    color: #333333;
}
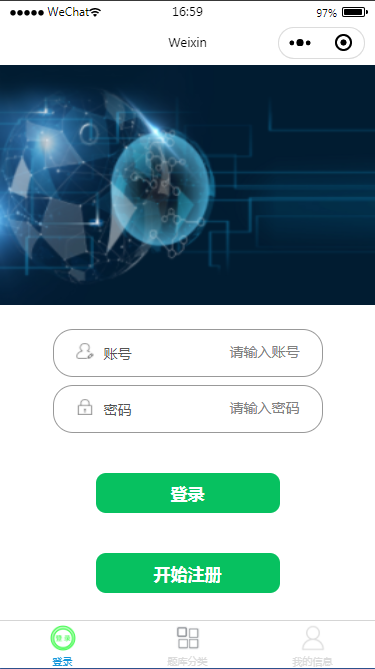
2.1.3、登录页面运行效果:
2.2、创建用户注册页面
2.2.1、修改页面文件:pages\register\register.wxml
<!--pages/register/register.wxml-->

<form  bindsubmit="formSubmit" bindreset="formReset">

<view class="content" >
  <view class="items">
    欢迎{{userInfo.nickName}}注册优学刷题系统
  </view>
  <view class="item">
    <input type="text" name="userName" placeholder="请设置4-20位用户名" placeholder-class="holder" bingblur="accountblur"/>
  </view>
  <view class="item flex">
    <input type="text" password name="password" placeholder="请设置5-20位登录密码" placeholder-class="holder"/>
  </view>
  <view class="item">
    <input type="text" name="nickname" placeholder="昵称" placeholder-class="holder"/>
  </view>
  <view class="item">
    <input type="text" name="phone" placeholder="手机号" placeholder-class="holder"/>
  </view>
  <view class="mobileInfo">
    <view class="mobile">
      <input type="text" name="email" placeholder="请输入邮箱" placeholder-class="holder"/>
    </view>
  </view>
  <view class="items">
    性别:
  </view>
  <view class="item">
    <input type="text" name="birth" placeholder="生日(1979-12-20)" placeholder-class="holder"/>
  </view>
  <view class="item">
    <input type="text" name="city" placeholder="通信地址" placeholder-class="holder"/>
  </view>
  <button class="btn"  form-type="submit">注册</button>
</view>

</form>
2.2.2、修改页面样式文件:pages\register\register.wxss
/* pages/company/company.wxss */
.content{
  width: 100%;
  height: 700px;
  background-color: #f2f2f2;
}
.hr{
  padding-top: 40px;
}
.item{
  margin: 0 auto;
  border: 1px solid #cccccc;
  height: 40px;
  width: 90%;
  border-radius: 3px;
  background-color: #ffffff;
  margin-bottom: 15px;
}
.items{
  margin: 0 auto;
  border: 1px solid #cccccc;
  height: 40px;
  width: 90%;
  border-radius: 3px;
  margin-bottom: 15px;
}
.item input{
  height: 40px;
  line-height: 40px;
  margin-left: 10px;
}
.holder{
  font-size: 14px;
  color: #999999;
}
.flex{
  display: flex;
  flex-direction: row;
}
.flex input{
  width: 300px;
}
item switch{
  margin-top: 5px;
  margin-right: 5px;
}
.mobileInfo{
  display: flex;
  flex-direction: row;
}
.mobile{
  margin: 0 auto;
  border: 1px solid #cccccc;
  height: 40px;
  width: 90%;
  border-radius: 3px;
  background-color: #ffffff;
  margin-bottom: 15px;
  display: flex;
  flex-direction: row;
  margin-left: 5%;
}
.mobile input{
  margin-top: 8px;
  margin-left: 10px;
}
.code{
  border: 1px solid #cccccc;
  height: 40px;
  width: 35%;
  background-color: #edeeec;
  border-radius: 3px;
  text-align: center;
  margin-left: 10px;
  line-height: 40px;
  color: #999999;
  font-size: 15px;
  margin-bottom: 15px;
  margin-right: 5%;
}
.btn{
  width: 90%;
  color: #999999;
  margin-top: 40px;
 }
2.2.3、配置从用户登录页面点击注册按钮,跳转到用户注册页面
2.2.3.1、修改pages\account\account.js
定义获取应用实例
//获取应用实例
const app = getApp()
增加获取用户信息方法,跳转到注册页面方法
https://developers.weixin.qq.com/miniprogram/dev/api/open-api/user-info/wx.getUserProfile.html
getUserProfile(e) {
    // 推荐使用wx.getUserProfile获取用户信息,开发者每次通过该接口获取用户个人信息均需用户确认
    // 开发者妥善保管用户快速填写的头像昵称,避免重复弹窗
    wx.getUserProfile({
      desc: '用于完善会员资料', // 声明获取用户个人信息后的用途,后续会展示在弹窗中,请谨慎填写
      success: (res) => {
        console.log(res.userInfo)
        //设置全局属性
        app.globalData.userInfo = res.userInfo

         //跳转到注册页码
        this.register()
      }
    })
  },
   //注册跳转
   register:function(){
     //跳转到注册页面
     wx.redirectTo({
       url: '../register/register',
     })
   }
2.2.3.2、修改pages\account\account.wxml页面
修改页面上的注册按钮,触发调用获取用户信息方法,然后跳转到注册页面
<button class="loginBtn" type="primary" bindtap="getUserProfile">开始注册</button>
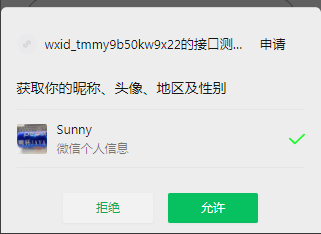
注意:用户点击该按钮时,会返回获取到的用户信息
2.2.4、配置在注册页面获取到微信用户信息
2.2.4.1、修改pages\register\register.js
定义获取应用实例
//获取应用实例
const app = getApp()
修改生命周期函数–监听页面加载 onLoad 增加获取微信用户信息方法
/**
   * 生命周期函数--监听页面加载
   */
  onLoad: function (options) {
    //从全局变量获取用户信息
    if (app.globalData.userInfo) {
      console.log(app.globalData.userInfo)
      this.setData({
        userInfo: app.globalData.userInfo
      })
    }
  }
设置性别数据:
data: {
    //设置性别选择数据
    sex: [{
      id: 1,
      value: '男'
    }, {
      id: 0,
      value: '女'
    }]
  },
修改register.wxml增加显示性别
 <view class="items">
    性别:
    <radio-group class="radio-group" bindchange="radioChange">
      <label class="radio" wx:for="{{sex}}" wx:key="key">
        <radio value="{{item.id}}" checked="{{item.checked}}"/>{{item.value}}
      </label>
    </radio-group>
  </view>
修改register.js增加性别选择处理方法radioChange
/**
   *
   * 捕获单选框的选中值
   */
  radioChange: function(e){
    console.log('radio发生change事件,携带value值为:', e.detail.value)
    //设置性别值给本地变量
    this.setData({
      gender: e.detail.value
    })
  }
2.2.5、测试运行效果:
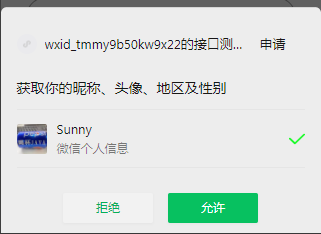
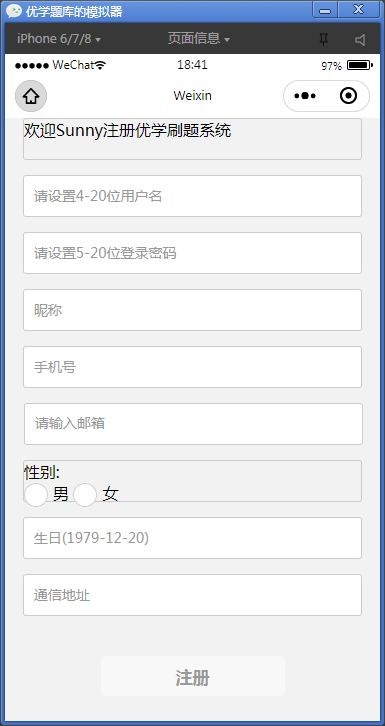
在登录页面点击 注册 按钮,即可弹出获取微信用户信息是否允许窗口,选择允许,即可跳转到注册页面
注册页面:
2.3、完成用户注册
2.3.1、修改pages\register\register.js
  formSubmit: function(e) {
    console.log('表单被提交')
  var that=  e.detail.value
  let baseUrl = app.globalData.baseUrl;
  wx.request({
    url: baseUrl+'/member/member/save',
    method:'POST',
    header:{'content-type':'application/json'},
    data:{
      userName: that.userName,
      password: that.password,
      nickname: that.nickname,
      phone: that.phone,
      email: that.email,
      gender:this.data.gender,//从本地变量获取性别
      birth: that.birth,
      city: that.city
    },
    success:function(res){
      console.log(res);
      if(res.data.code==0){
        console.log("注册成功")
        wx.showToast({
          title: "注册成功",
          icon: 'none',
          duration: 1000,
          success:function(){

            console.log('haha');

            setTimeout(function () {

              //要延时执行的代码

              wx.switchTab({

                url: '../account/account'

              })

            }, 1000) //延迟时间

          }
        })

      }else{
        console.log(res.data.msg)
        wx.showToast({
          title: res.data.msg,
          icon: 'none',
          duration: 2000
        })
      }


    }
  })
  }
2.3.2、修改pages\register\register.wxml
<form bindsubmit="formSubmit" bindreset="formReset">
表单提交绑定formSubmit方法
2.3.3、用户注册演示效果
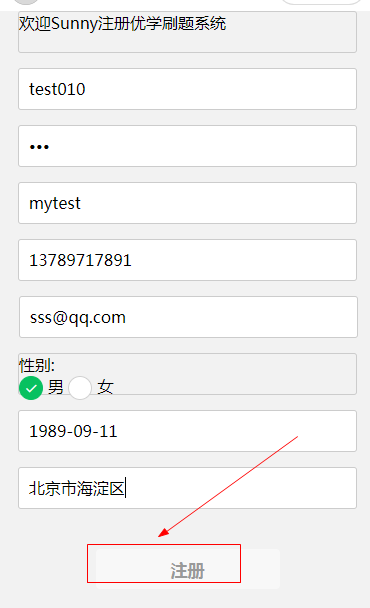
点击注册按钮,注册成功,跳转到用户登录页面
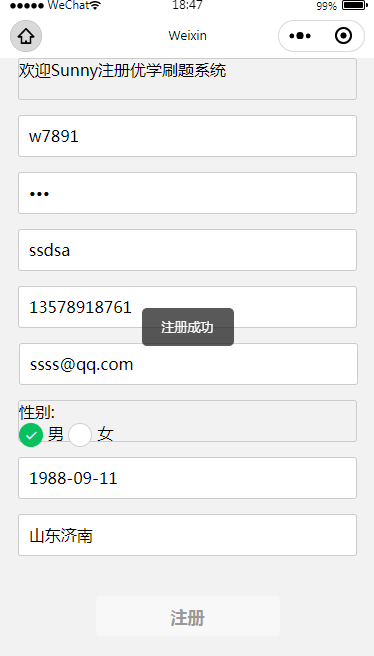
等待1秒钟,跳转到登录页面
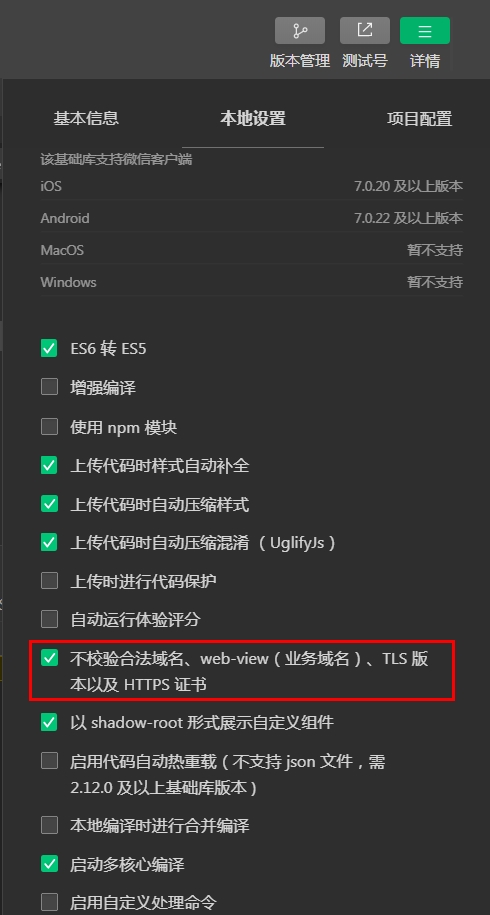
注意控制台如果报错:
VM1540 asdebug.js:1  http://localhost:8888 不在以下 request 合法域名列表中,请参考文档:https://developers.weixin.qq.com/miniprogram/dev/framework/ability/network.html
解决方案:
2.4、完成用户登录
2.4.1、修改pages\account\account.js
// 获取输入账号
  usernameInput: function (e) {
    this.setData({
      username: e.detail.value
    })
  },

  // 获取输入密码
  passwordInput: function (e) {
    this.setData({
      password: e.detail.value
    })
  },
   // 登录处理
  login: function () {
    var that = this;
    console.log('用户登录')
    if (that.data.username.length == 0 || that.data.password.length == 0) {
      wx.showToast({
        title: '账号或密码不能为空',
        icon: 'none',
        duration: 2000
      })
    } else {
      let baseUrl = app.globalData.baseUrl;
      wx.request({
        url: baseUrl+'/member/member/login',
        method:'POST',
        header:{'content-type':'application/json'},
        data:{
          username: that.data.username,
          password: that.data.password
          },
        success:function(res){
          console.log(res);
          if(res.data.code==0){
            console.log("登录成功")
            //登录成功,存储token到本地存储 类似于cookie
            wx.setStorageSync('token', res.data.token);
            wx.setStorageSync('refreshToken', res.data.refreshToken);
           //显示登录成功提示,跳转到题库分类页面
            wx.showToast({
              title: "登录成功",
              icon: 'none',
              duration: 1000,
              success:function(){
                console.log('haha');
                setTimeout(function () {
                  //要延时执行的代码
                  wx.switchTab({
                    url: '../type/type'
                  })
                }, 1000) //延迟时间
              }
            })

          }else{
            console.log(res.data.msg)
            wx.showToast({
              title: res.data.msg,
              icon: 'none',
              duration: 2000
            })
          }


        }
      })
    }
  },
注意:用户登录传递给后端的是json格式的数据,所有后代代码要调整能接收json数据
//用户登录方法
    @PostMapping("login")
    public R login(@RequestBody Map<String, String> map){

        //调用服务,根据用户名、密码获取用户信息
        MemberEntity memberEntity = memberService.login(map.get("username"), map.get("password"));
2.4.2、修改pages\account\account.wxml
<button class="loginBtn" type="primary" bindtap="login">登录</button>
2.4.3、演示登录效果
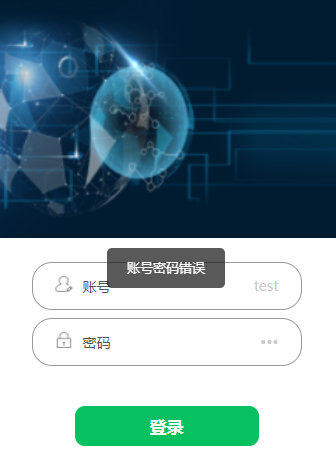
输入账号密码错误,提示
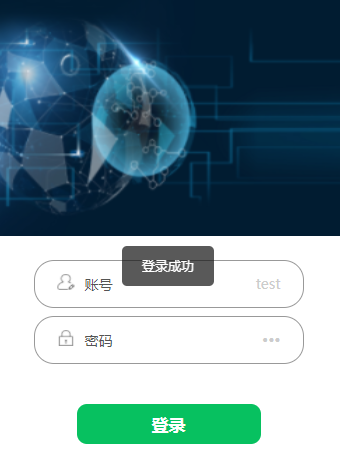
账号密码正确,提示登录成功,稍后跳转到分类列表页
三、题库分类功能开发
3.1、创建广告轮播图模板页面
pages/template/head.wxml
<view class='haibao'>
  <swiper
  indicator-dots='true'
   autoplay='true'
   interval='3000'
   duration='1000'
   circular='true' >
 <block wx:for="{{imgurls}}" wx:key="key">
    <swiper-item>
    <image src="{{item.imgUrl}}" class="side-image" style="width:100%"></image>
    </swiper-item>
 </block>
  </swiper>
</view>
3.2、创建题库分类页面
pages/type/type.wxml
     <!--pages/type/type.wxml-->
      <include src="../template/head.wxml" />
      <view class="cu-list menu sm-border solid-bottom card-menu margin-top" wx:for="{{exams}}" wx:for-item="item" id="{{itemtap}}">
        <view class="cu-item ">
          <view bindtap="getItem" data-id="{{item.id}}" class="action text-bold text-black text-lg">
            <image src="{{item.logoUrl}}" class="img"></image>
            <text class="cu-title"></text>
            {{item.type}}
          </view>
        </view>
      </view>
注意:点击分类名称跳转到题目列表方法 bindtap=“getItem” 传递分类编号 data-id="{{item.id}}"
3.3、编写题库样式
修改type.wxss
.top_title{
  font-family: Neue;
  color: #888;
  position: absolute;
  left: 15px;
  bottom: 0px;
  height: 26px;
}
.img{

  width: 100rpx;

  height: 100rpx;

  padding: 10rpx;

 }

.scroll_item_name {
  margin-left: 10rpx;
  line-height: 150rpx;
  text-align: left;
  font-size: 36rpx;
}

.alter_name {
  position: fixed;
  top: 460rpx;
  background-color: #000;
  height: 200rpx;
  width: 500rpx;
  left: 125rpx;
}

.input_name {
  display: flex;
  margin-top: 10rpx;
  height: 80rpx;
}

.alter_btn {
  width: 100%;
  margin-top: 20rpx;
  height: 80rpx;
  bottom: 20rpx;
  display: flex;
}

.flex-item {
  width: 150rpx;
  height: 80rpx;
  background-color: #fff;
  color: #000;
  display: flex;
  justify-content: center;
  align-items: center;
}
.round-click {
	height: 120rpx;
	width: 120rpx;
	background-color:#fec432;
	border-radius: 100%;
	position: fixed;
	bottom: 150rpx;
	right: 20rpx;
	display: flex;
	align-items: center;
	justify-content: center;
	z-index: 9;
}
.round-click view {
	font-size: 32rpx;
	max-width: 80rpx;
	color: #fff;
	text-align: center;
}
3.4、修改js文件
//获取应用实例
const app = getApp()
编写获取分类数据方法、获取广告轮播图数据方法、设置页面加载时调用2个方法
 onShow:function(){
    wx.showTabBar({
      animation: true,
    })
    //读取全部分类数据
    this.loadAllType()
    //读取广告轮播图数据
    this.loadConext()
  },
  //读取全部分类数据
  loadAllType:function() {
    let baseUrl = app.globalData.baseUrl;
    var t = this;
    wx.request({
      url: baseUrl+'/question/type/findall',
      method:'GET',
      header:{'Authorization':wx.getStorageSync('token')},
      success:function(res){
        console.log(res.data);
        t.setData({
          exams:res.data.data
        })
        console.log(res.data);
      }
    })
  },
  //读取广告轮播图
  loadConext:function(){
    let baseUrl = app.globalData.baseUrl;
    var t = this;
    wx.request({
      url: baseUrl+'/context/banner/list?page=1&limit=5',
      method:'GET',
      header:{'Authorization':wx.getStorageSync('token')},
      success:function(res){
         console.log("log : "+res.data.page.list);
        t.setData({
          imgurls: res.data.page.list
        })
        console.log("log : ");
      }
    })
  }
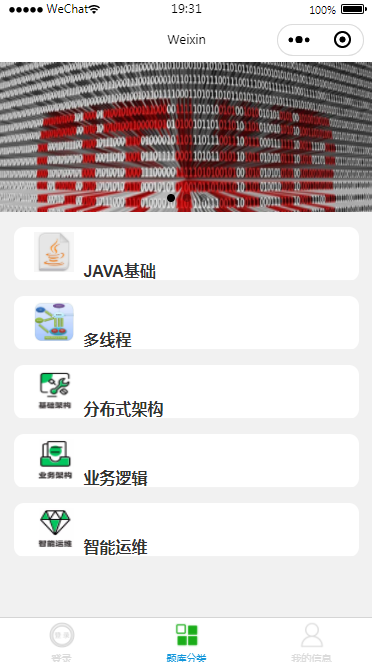
3.5、演示效果
3.6、编写从分类跳转到题目列表页面
修改type.js
    //点击分类,跳转到题目列表页
    getItem:function(e){
      var id = e.currentTarget.dataset.id
      console.log("key : "+id);
      wx.navigateTo({
        url: '../item/item?id='+id,
      })

    },
对应type.wxml调用跳转方法
 <view bindtap="getItem" data-id="{{item.id}}" class="action text-bold text-black text-lg">
            <image src="{{item.logoUrl}}" class="img"></image>
            <text class="cu-title"></text>
            {{item.type}}
</view>
四、题目列表功能开发
4.1、创建题目列表页面
pages/item/item.wxml
<include src="../template/head.wxml" />
<view class="cu-list menu sm-border solid-bottom card-menu margin-top" wx:for="{{items}}" wx:for-item="item" >
        <view class="cu-item ">
          <view bindtap="getInfo" data-id="{{item.id}}" class="action text-bold text-black text-lg">
            <text class="cuIcon-title text-blue"></text>
            {{item.title}}
          </view>
        </view>
      </view>
4.2、创建题目列表样式
pages/item/item.wxss
.page_op{
  width: 100%;
  height: 75px;
  display:flex;
  /*flex-direction:row;*/
}

.btn_op{
    width: 125px;
    height: 75px;
    color: #000;
    font-size: 40px;
    display: flex;
    justify-content: center;
    align-items: center;
}

.page_line{
  width: 100%;
  display:flex;
  /*flex-direction:row;*/
}

.line1{
    position: relative;
    left: 188rpx;
    width: 1px;
    background-color: #000;
}
.line2{
    position: relative;
    left: 562rpx;
    width: 1px;
    background-color: #000;
}
4.3、创建题目列表js文件
pages/item/item.js
//获取应用实例
const app = getApp()
设置页面初始化数据
  /**
   * 页面的初始数据
   */
  data: {
    pageNo: 1,
    id: 1,
    limit: 7,
    totalPages: 1,
    items: []
  },
编写当页面加载的时候,获取题目列表数据、广告轮播图数据
 /**
   * 生命周期函数--监听页面加载
   */
  onLoad: function (options) {
    //捕获分类列表页传递过来的分类id
    this.setData({
      id: options.id
    })
    //获取对应分类题目列表数据
    this.getItemList()
   //读取广告轮播图数据
    this.loadConext()
  },
  //读取题目分类数据
  getItemList:function(){
    var t = this;
    let baseUrl = app.globalData.baseUrl;
    wx.request({
      url: baseUrl+'/question/question/list?page='+this.data.pageNo+'&limit='+this.data.limit+'&key='+this.data.id,
      method:'GET',
      header:{'Authorization':wx.getStorageSync('token')},
      success:function(res){
         console.log(res.data.page);
        t.setData({
          items: res.data.page.list,
          totalPages: res.data.page.totalPage

        })
        console.log("log : ");
      }
    })
  },
 //获取广告轮播图数据
  loadConext:function(){
    let baseUrl = app.globalData.baseUrl;
    var t = this;
    wx.request({
      url: baseUrl+'/context/banner/list?page=1&limit=5',
      method:'GET',
      header:{'Authorization':wx.getStorageSync('token')},
      success:function(res){
         console.log("log : "+res.data.page.list);
        t.setData({
          imgurls: res.data.page.list
        })
        console.log("log : ");
      }
    })
  },
注意调整后端代码 u-question模块的—QuestionServiceImpl的queryPage方法,增加如下代码:
 //获取分类编号
     String type= (String) params.get("type");
        if(!StringUtils.isEmpty(type)){
            queryWrapper.eq("type",type);
        }
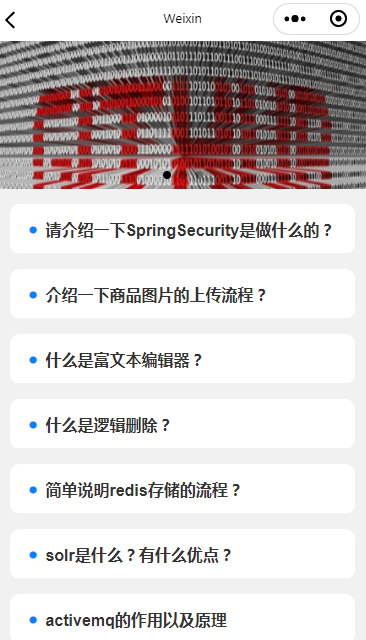
4.4、题目列表演示效果
4.5、题目列表下拉获取更多数据处理
修改pages/item/item.js
增加上拉触底获取下一页数据方法
 /**
   * 页面上拉触底事件的处理函数
   */
  onReachBottom: function () {
    var t=this;
   console.log(' 页面上拉触底事件的处理函数');
   //判断当前页码小于总页码,就把当前页加1,获取下一页内容
   if(t.data.pageNo<t.data.totalPages){
   t.setData({
     pageNo: t.data.pageNo+1
   })
   console.log(t.data.pageNo);
   let baseUrl = app.globalData.baseUrl;
   wx.request({
     url: baseUrl+'/question/question/list?page='+this.data.pageNo+'&limit='+this.data.limit+'&key='+this.data.id,
     method:'GET',
     header:{'Authorization':wx.getStorageSync('token')},
     success:function(res){
       //合并下一页的数据到当前集合 合并数组是把后一个数组的值依次push进前一个数组,使前一个数组发生改变
       t.data.items.push.apply(t.data.items.list,res.data.page.list)
       t.setData({
         items: t.data.items
       })
     }
   })
  }else{
    wx.showToast({
      title: '我是最后一页了!',
      icon: 'none',
      duration: 1000
    })
  }
 },
newVideoList.concat(videoList),
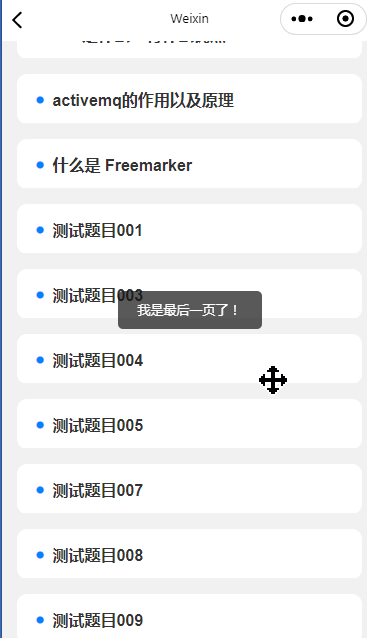
演示效果,题目列表到了最后,上拉,即可自动加载显示更多数据
注意:数据必须铺满,才能演示下拉触底方法,可以用鼠标向下滚轮。
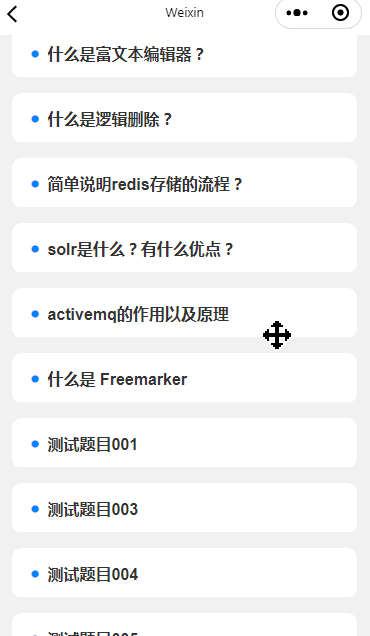
拉倒最后一页,提示
4.6、编写点击题目标题跳转到题目详情页
修改pages/item/item.js
 //跳转到题目详情页
  getInfo:function(e){
    var id = e.currentTarget.dataset.id
    console.log("key : "+id);

    wx.navigateTo({
      url: '../info/info?id='+id,
    })

  },
修改页面item.wxml
<view bindtap="getInfo" data-id="{{item.id}}" class="action text-bold text-black text-lg">
 <text class="cuIcon-title text-blue"></text>
    {{item.title}}
</view>
五、题目详情开发
5.1、创建题目详情页面
pages/info/info.wxml
<include src="../template/head.wxml" />
<view class="news-detail-container">
  <view class="author-time">
    <text class="const-text">发表于</text>
    <text class="time">{{ question.createTime }}</text>
    <text class="const-text">评分:{{question.level}}</text>
  </view>
  <text class="title">{{ question.title }}</text>
  <view class="tool">

    <view class="horizon"></view>
    <text class="detail">{{ question.answer }}</text>
  </view>
</view>
5.2、创建题目详情样式
pages/info/info.wxss
.news-detail-container{
  display: flex;
  flex-direction: column;
}

.head-img{
  width: 100%;
}

.author-time{
  flex-direction: row;
  margin-left: 30rpx;
  margin-top: 20rpx;
}

.author-avatar{
  height: 64rpx;
  width: 64rpx;
  border-radius: 50%;
  vertical-align: middle;
}

.author-name{
  font-size: 30rpx;
  font-weight: 700;
  margin-left: 20rpx;
  vertical-align: middle;
  color:#666;
}

.const-text{
  font-size: 24rpx;
  color:#999;
  margin-left: 20rpx;
}

.time{
  font-size: 24rpx;
  margin-left: 30rpx;
  vertical-align: middle;
  color: #999;
}

.title{
  margin-left: 40rpx;
  font-size: 36rpx;
  font-weight: 700;
  margin-top: 30rpx;
  letter-spacing: 2px;
  color: #4b556c;
}

.tool{
  margin-top: 20rpx;
}

.circle-img{
  float: right;
  margin-right: 40rpx;
  vertical-align: middle;
}

.circle-img image{
  width: 50rpx;
  height: 50rpx;
}

.share-img{
  margin-left: 30rpx;
}

.horizon{
  width: 660rpx;
  height: 1px;
  background-color: #e5e5e5;
  vertical-align: middle;
  position: relative;
  top: 46rpx;
  margin: 0 auto;
  z-index: -99;
}

.detail{
  color:#666;
  margin-top: 20rpx;
  margin-right: 30rpx;
  margin-left: 30rpx;
  line-height: 44rpx;
  letter-spacing: 2px;
  font-size: 24rpx;
}

.playermusic{
  width: 60rpx;
  height: 60rpx;
  vertical-align: middle;
  margin-left: 40rpx;
}
5.3、编写题目详情js文件
pages/info/info.js
//获取应用实例
const app = getApp()
页面加载获取详细数据、轮播图数据
/**
   * 生命周期函数--监听页面加载
   */
  onLoad: function (options) {
     //获取跳转传递过来的题目编号
     var id=options.id
     //读取广告轮播图
     this.loadContext();
     //读取题目信息
     this.loadQuestionInfo(id);

  },
  //读取题目信息
  loadQuestionInfo:function(id){
    var baseUrl=app.globalData.baseUrl
    var t=this
    //发错请求读取题目信息
    wx.request({
      url: baseUrl+'/question/question/info/'+id,
      method: 'GET',
      header:{
        'Authorization':wx.getStorageSync('token')
      },
      success:function(res){
        //把服务器响应数据设置到本地变量
        t.setData({
         question: res.data.question
        })
      }
    })
  },
 //获取广告轮播图数据
  loadContext:function(){
    var baseUrl=app.globalData.baseUrl
    var t=this
    //发出请求
    wx.request({
      url: baseUrl+'/context/banner/list',
      method: 'GET',
      header:{
        'Authorization':wx.getStorageSync('token')
      },
      success:function(res){
        t.setData({
          imgurls: res.data.page.list
        })
      }
    })
  }
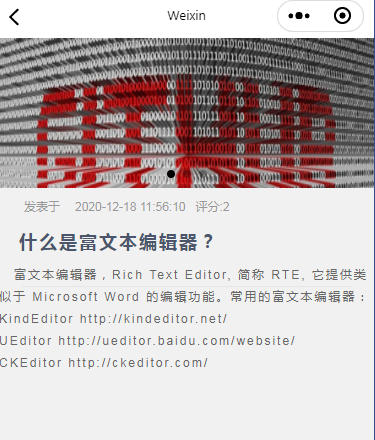
5.4、题目详情演示效果
六、内网穿透(选学)
6.1. 内网穿透
支付异步通知需要独立ip使阿里支付成功后可以回调我们的接口,所以前提条件就是内网穿透。
哲西云:https://cloud.zhexi.tech
cpolar:https://www.cpolar.com/
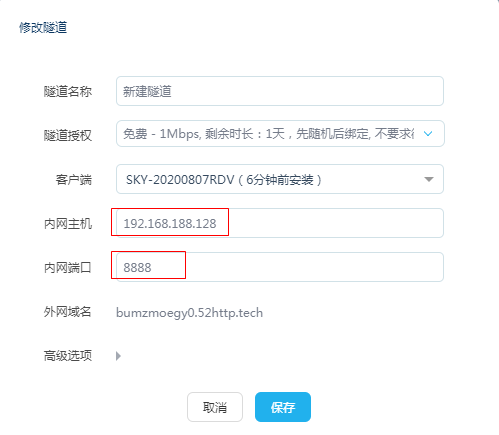
哲西云浏览器客户端配置隧道,映射网关的8888端口:
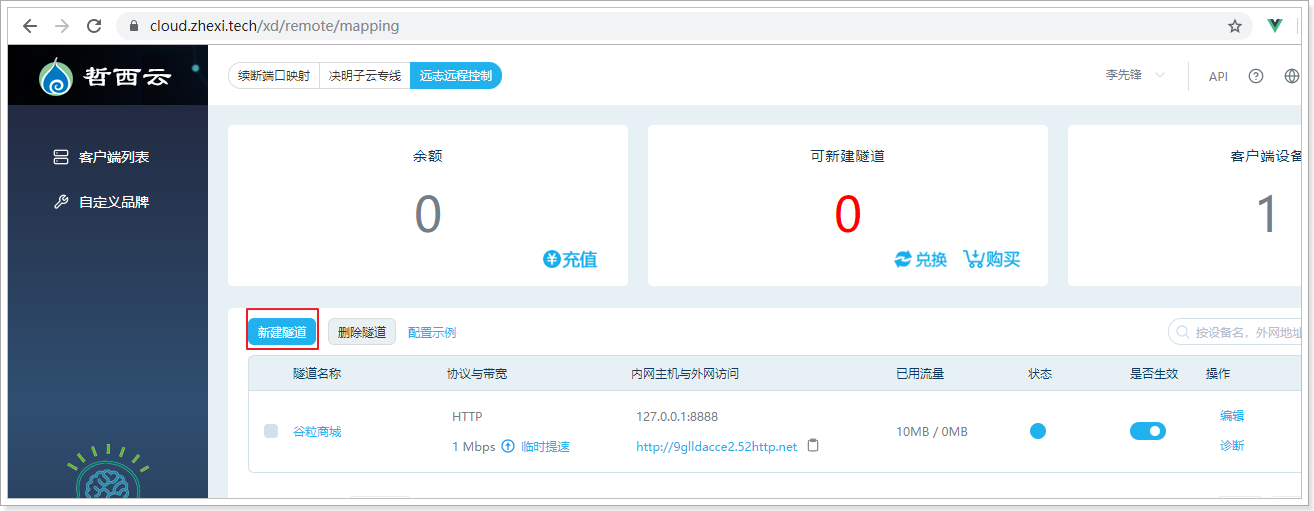
具体配置如下:
测试内网穿透:访问登录接口
http://bumzmoegy0.52http.tech/member/member/login?username=test&password=123

6.2、修改微信小程序对接地址
修改文件app.js
 globalData: {
    userInfo: null,
    baseUrl: "http://bumzmoegy0.52http.tech"

  }
启动真机调试:
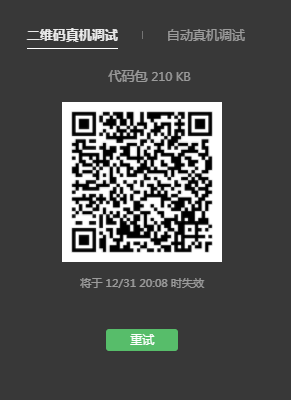
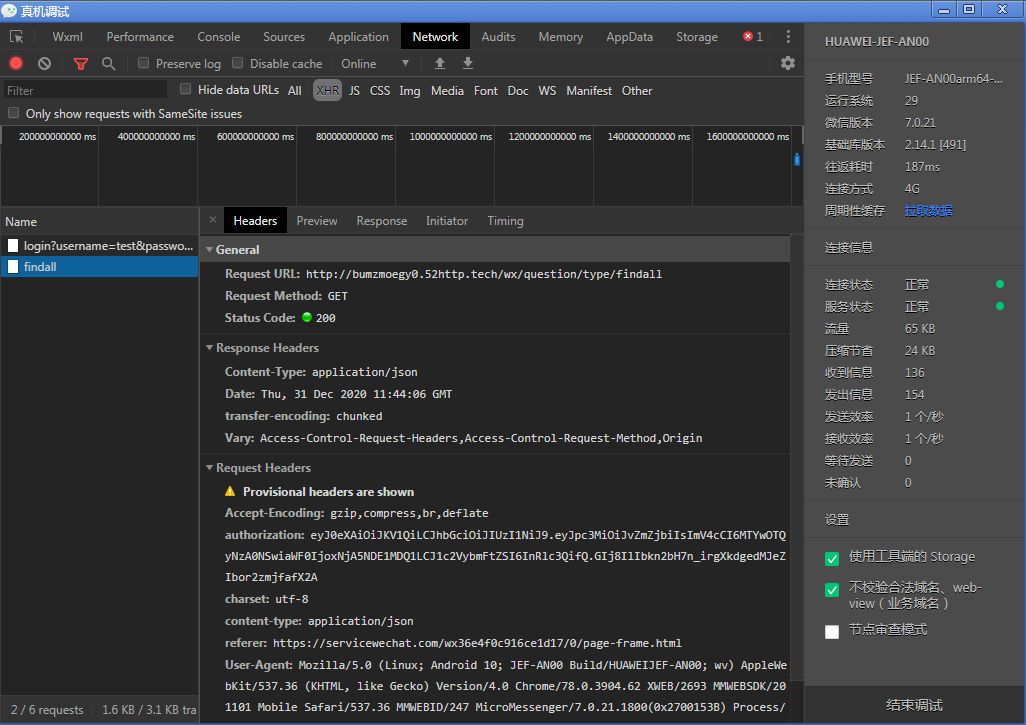
微信扫描即可在手机端展开调试